www.ptreview.co.uk
13
'20
Written on Modified on
Perfect optics through light scattering
Highly sensitive and rapid measurements of optical components.

Innovative technologies are the key to tackling some of society’s key challenges – and many of these technologies have an optical system at their core. Examples include semiconductor lithography systems designed to create ever-smaller and more energy-efficient microchips, satellite-based high-resolution earth observation systems, and basic research in the field of gravitational-wave detection. In the realm of optics, however, even the tiniest imperfections can lead to scattered light, which causes a reduction in contrast and a lower light yield. Today’s optical systems therefore rely on optimized design and comprehensive inspection of the complete surface of optical components. To achieve this, the Fraunhofer Institute for Applied Optics and Precision Engineering IOF is developing light scattering measurement techniques that can detect unwanted scattered light.
The surface quality of an optical surface is the key to achieving the required level of imaging quality. No surface is completely free of imperfections. Even crystals – which come very close to representing an ideal solid – exhibit defects and flaws. Getting the right balance as early as the optical design phase requires detailed specifications in a number of areas, including the extent of imperfect points on the surface that is regarded as acceptable and the degree to which any necessary coatings and other factors may influence these values.
This data can be provided by Fraunhofer IOF, which develops a wide range of light scattering measurement systems and sensors as well as the corresponding analytical methods and light scattering models. These tools can be used to apply a virtual coating, allowing scientists to make light scattering predictions before production takes place. They also pave the way for in-line characterization of complex optics – in other words, performing automated inspection and complete analysis of a surface based on its design and construction datasets.
“These tools can help get the optimum balance between manufacturing costs and useful benefits. The optics used in satellites are a good example. The challenge here is to produce multiple optics of the same type – for example as a flight model, reset module etc. – while operating at the limits of what is technically feasible in a production environment in particular for applications at short wavelengths. That’s why it is so important to rely on robust and meaningful, in-line analyses offered by light scattering measurement techniques,” says Marcus Trost, who heads up the characterization group at Fraunhofer IOF.
Light scattering measurement technique offers clear benefits
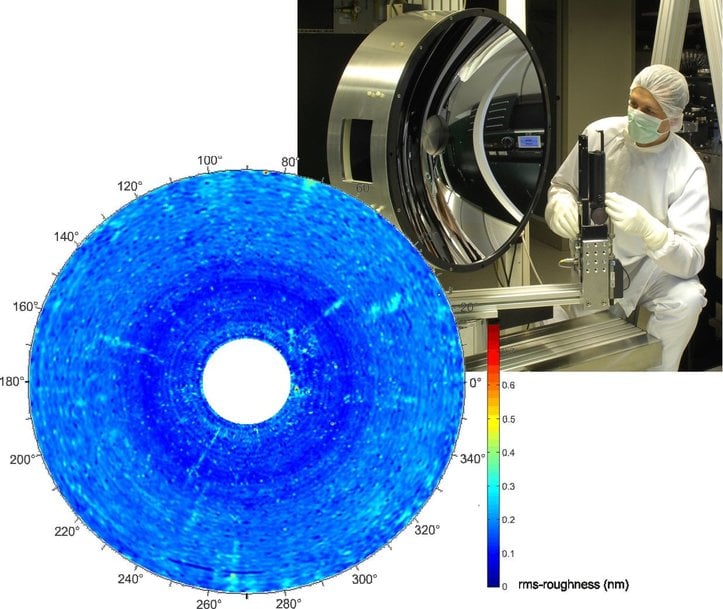
Surface imperfections are traditionally measured by microscopy, interferometry or tactile methods that involve probing the surface with a diamond needle. These techniques are very time-consuming and expensive, however. For smooth surfaces, light scattering measurements systems already offer a tried-and-tested alternative that combines high sensitivity with fast, non-contact measurements. What’s more, they are not susceptible to vibrations, making them a highly robust option. As an example, it would take over 40 years to inspect the entire surface of a 60-centimeter-diameter mirror with an atomic force microscope, yet light scattering techniques could be used to do the same job in just a few hours.

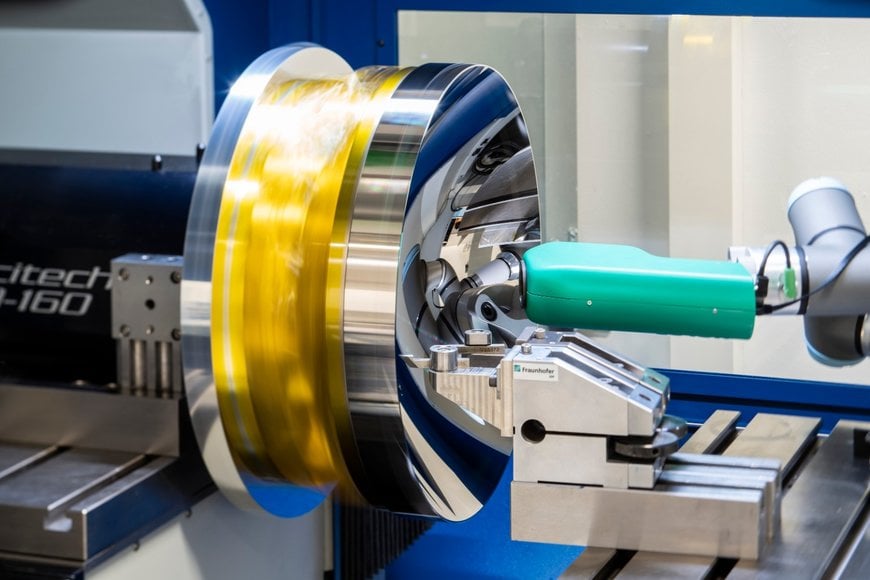
Roughness inspection during diamond turning with a light scattering sensor.
That makes this method a good choice for meeting the ever more demanding requirements of industry and research for optical components. It also makes it possible to meet high functional and quality standards while optimizing costs and production times. Fraunhofer IOF is already catering to international demand for optics characterization from producers of optical systems, and it has also built up a solid network of expertise in Germany’s “Optics Valley”, a cluster of high-tech companies in the Jena region.
Satellite missions already benefiting
Fraunhofer IOF has already contributed its expertise to manufacturing and optimizing a number of satellite optics, including the German Aerospace Center’s Environmental Mapping and Analysis Program (EnMAP). Starting this year, this project aims to compile the most detailed spectrally resolved information ever acquired on ecosystems on the Earth’s surface. Fraunhofer IOF’s skills have also been applied to the multispectral Earth observation applications that form part of the European Space Agency’s Sentinel program. The ESA will also be launching a new telescope into space this year: the Euclid space telescope will be making a new survey of the farthest reaches of the universe, paving the way for new insights into dark matter and dark energy.
Ready to be integrated into production
Unlike traditional measurement techniques, this method is not sensitive to vibrations, making it easier to incorporate in production processes. As an example, Fig. 2 shows the integration of a compact light scattering sensor in an ultra-precision diamond turning machine that was specially developed for the rapid and flexible characterization of roughness and defects. This allows the characterization of surface roughness to be carried out in-line in the manufacturing process and even allows process parameters to be modified as needed.
Fraunhofer IOF’s measurement systems also meet the criteria of the Fraunhofer lighthouse project “Hierarchical swarms as production architecture with optimized utilization (SWAP)”. This project aims to identify new technological concepts to shape the future of production. Its key focus is on the shift from traditional workpiece processing in a defined sequence of processes to a more collaborative and (semi-)autonomous production.
www.fraunhofer.de

