www.ptreview.co.uk
17
'21
Written on Modified on
“Superpower” Boost: The Dynamic Duo of Laser Trackers and the 6DoF Probe
Across Japan and Asia at large, one pop-cultural superhero franchise stands above the rest: Ultraman. Created in 1966, Ultraman and his crew of “Ultras” have achieved Superman-like status. And like the Man of Steel, they share much in common. Superman can shoot laser beams from his eyes while Ultraman has his Specium Ray. Superior strength and stamina are a given for both. They also each possess super vision – the ability to see objects beyond the visible spectrum of light.

Franchises like Ultraman and Superman have generational staying power for a reason. They resonate because we aspire to have special powers. This is especially true when it comes to large-scale manufacturing and construction. In the last few decades, laser tracker technology has advanced considerably and has become a common solution within the aerospace and automotive industries, as well as in a variety of additional applications where unparalleled precision measurement and accuracy are key.
But for as much progress as we’ve made, enhancing our perceptual ability has remained difficult. What happens when a traditional laser tracker loses its line of sight around or behind an object, or below (or above) the beam’s plane of
data capture? What if a human operator or some unexpected physical barrier disrupts the beam?
The short answer is nothing good. The longer answer is: increased downtime, decreased productivity, and increased labor costs. There’s also the increased risk of measurement error as equipment operators are forced to “leapfrog” around whatever it is they’re measuring in a bid to capture all relevant data points. In competitive markets like aerospace and automotive engineering, that’s a hodgepodge of headaches no large-scale manufacturer wants to deal with.
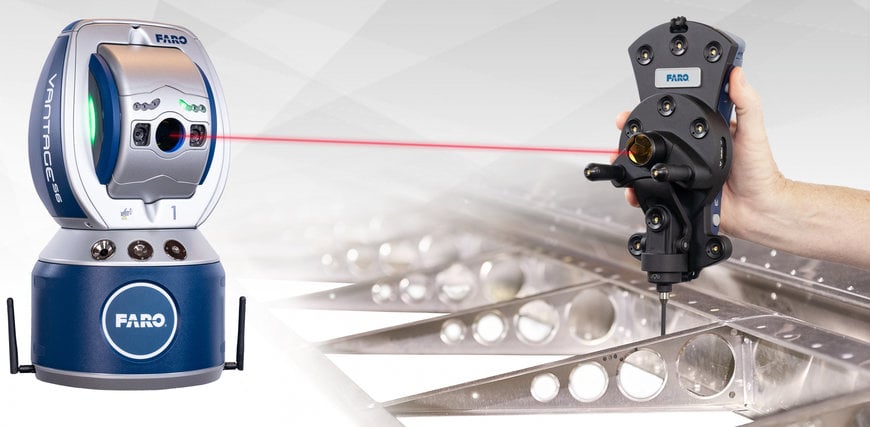
Encouragingly this is beginning to change as a new “superpower” is becoming available for all large-scale measurement tasks. It’s coming thanks to the union of FARO Laser Trackers and the new FARO Vantage Laser Tracker 6 Degrees of Freedom (6DoF) Probe. Together they form a dynamic duo of measurement and laser tracking ability that gives operators a “sixth sense” allowing them to accurately measure the most difficult-to-reach parts beyond the line of sight, radically enhancing productivity and efficiency.
Laser Trackers: Metrology’s “Super tool”
For industries that regularly perform large-scale measurements, laser trackers are metrology’s “super tool” of choice offering accurate 3D measurements collected by a single operator. They are ideal for alignment, machine installation,
maintenance, part and assembly inspection, tool/die/mold building, reverse engineering, and robot calibration.
Laser trackers work by measuring two angles, plus a distance. The tracker emits a laser beam to a retroreflective target (commonly a spherically mounted retro reflector, or SMR) that’s held against the object being measured. The light reflected traces its own path back to the tracker. As the light re-enters the tracker, a distance meter in the tracker calculates the distance from the tracker to the retroreflector and precision encoders measure the angle of the beam. The distance and angles are transferred to metrology software to establish the X, Y and Z coordinates for the point measured. The software then uses the collected points to model the as-built part and to compare it to the original design.
Contrary to dated perceptions, modern laser trackers are easy to use. Nor is absolute line of sight a must. Historically, measuring was a highly manual effort requiring absolute line of sight between the tracker and the SMR. If anything got between the two, the laser line would be broken, and the user would have to manually find the laser again. In order to use these early trackers efficiently, operators needed extensive training and lots of experience.
Recent innovations, such as the ActiveSeek™ feature on the FARO Vantage, have mitigated this concern by allowing the laser to actively locate and lock onto the target even if the line of sight is broken. Operators can use this technology without rigorous training and, as a result, the time needed to measure large or complicated objects
is dramatically reduced.

6 DoF: No Tokusatsu Required
FARO’s newest 6DoF is a wireless, handheld probe that seamlessly integrates with FARO VantageS6 and VantageE6 Laser Trackers. The device offers exceptional portability and enables users to build, inspect and measure products faster and with greater accuracy than ever before.
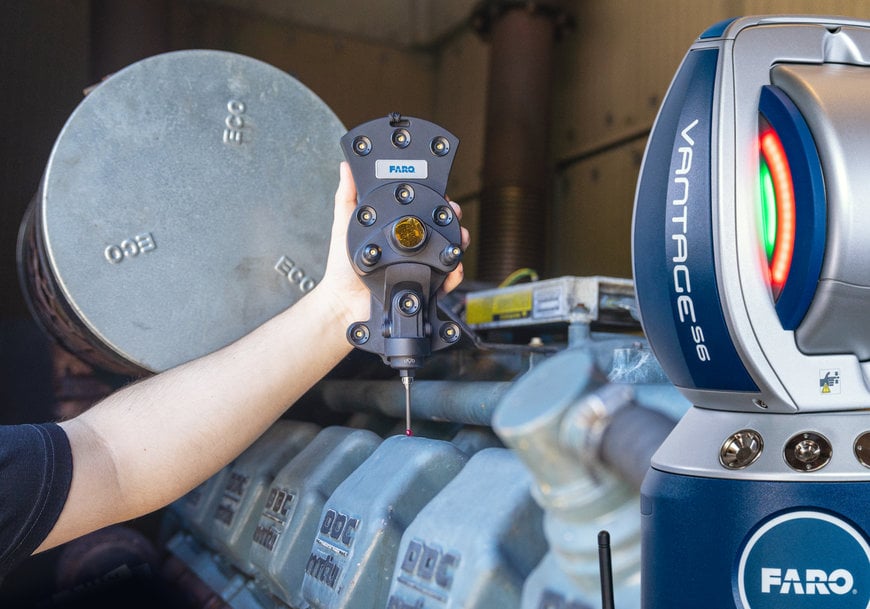
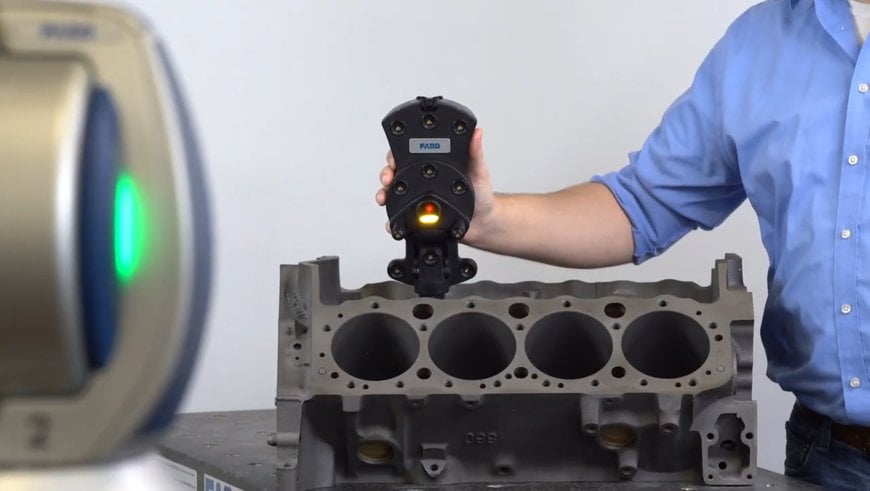
The 6Probe meets the dynamic measurement, speed, and accuracy requirements of the most challenging industrial applications. With kinematic self-identifying styli, users can swap probing tips quickly and measure without any recalibration. They can also measure hidden areas outside of the tracker’s line of sight, with wider acceptance angles. The result is an advanced tool designed to enhance productivity and efficiency, saving users at least 30 minutes of time on any given workday, improving measurement consistency and reliability in a variety of working environments.
FARO trackers also support the patented Super 6DoF TrackArm solution, which allows the Vantage and one or more FARO ScanArms to work together to create an integrated contact and non-contact 3D measurement system for large-volume measurement. With a range of up to 60 meters (with a 4-meter reach), Super 6DoF eliminates line-of-sight challenges and expands measurement range while maintaining superior accuracy.
Soaring to Success: Trackers and Probes, Measurement at Work
Of course, reading about how two products work in isolation or in combination is only half the fun. Just like watching Ultraman on TV perform his death-defying feats, as with FARO’s Laser Trackers and 6Probe, seeing is believing.
An excellent example of FARO’s trackers and 6Probe working together comes from the United States. There, Midwest Metrology Solutions (MMS), provides on-site precision measurement services using state-of-the-art metrology equipment and software to employ laser tracker technology for large-part inspection and alignment. While pleased with their technology of choice for large-volume measurements, MMS, like other companies, historically had an inherent operational challenge.
“The Achilles heel of the laser tracker is always line of sight,” explained Cody Thacker, owner of MMS. “There’s always some place you just can’t get a tracker into. Whether there’s a deep hole you need to reach down in or a small surface that’s just around a corner from your tracker’s line of sight.”
After considerable due diligence, MMS selected the VantageS6 and the 6Probe. With 6DoF, MMS was able to easily measure hidden areas that were not in the direct line of sight of the tracker, plus small, hard-to-reach spaces or tiny features that could not be accessed with a standard SMR. For MMS, advances like this really paid off, allowing the company to reduce inspection time by 50%.
Additionally, while the company already had a laser tracker when they began working with a major manufacturer of nuclear systems, purchasing the VantageS6 with 6DoF put them in a better position to pitch larger and more
lucrative projects.
According to MMS, FARO’s powerful duo also was cost effective at about 50% of the price of alternative products. It made tracking (with ActiveSeek) in front of, behind, and around obstacles easy and delivered time-savings, and
includes a self-contained carrying case that can be checked with airlines and is ideal for product portability.
“With the 6DoF system, we can just leave the tracker where it is and use the 6Probe to get the measurements we need,” Thacker added. “This system really expands what you’re able to do – both capabilities and efficiency on a job.”
Laser Trackers, Aviation, and Robot Reliability
Like any good superhero with X-Ray vision (or its real-world FARO equivalent), FARO Laser Trackers have more than one superpower. This is an important fact Nabeya Manufacturing Co. Ltd. of Kakamigahara, Japan learned when it shifted from traditional hand tools such as calipers and micrometers for measuring large aircraft components (components that possess free-form surfaces) and purchased FARO equipment.
Prior to the changeover, Nabeya found it challenging to conduct part inspections. Additionally, due to tightened regulations, delivered components required reports generated by 3D measurement devices. While the team had access to a gantry-type coordinate measuring machine (CMM), some of the aircraft components were too large for the measuring plate, so the team still could not rely on it for certain tasks.
“We frequently perform measurements on aircraft components such as the fuselage and wings, and these parts can measure up to seven meters in length,” explained Hiroaki Noda, Leader of Nabeya’s Measurement Division. “These parts are too bulky to fit on the fixed CMM, and it became evident that we had an urgent need for a portable laser tracker.” By way of example, with a range of up to 80m, the VantageS allows measurement of any part they have.
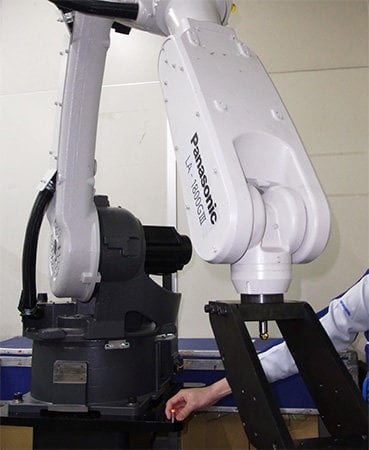
Yet another “superpower” was the device’s applicability to robot calibration. As more manufacturers adopt automation and industrial robots in their factories, Nabeya observed a corresponding rise in demand for robot calibration too. Such calibration is essential for maintaining accuracy of these industrial robots as they tend to drift from their intended paths over time, producing quality issues in final components. Using the FARO tracker, the team can now conduct dynamic measurements to check the precision of a robot’s movements and adjust the robot’s parameters to produce higher quality parts.
The laser tracker delivers all of this functionality in a single unit that one person can transport themselves. “The high portability of the equipment has allowed us to travel anywhere in Japan, and overseas, to support measurement projects,” Noda added. “3D measurement devices are a must-have for any manufacturer because even the smallest components require measurement data for delivery.”

“Vantage” points: Factory Automation and the BuildIT Software Sidekick
To complete our superhero/superpower analogy, many super beings have one, sometimes multiple sidekicks – partners who help get the job done. FARO technology is no different. While the Vantage Laser Trackers team up well with the 6Probe, they also make a great team with FARO BuildIT Metrology software. It’s yet another pairing the Panasonic Smart Factory Solutions Co., Ltd. was excited to embrace when it adopted both hardware and software solutions. Located in Toyonaka, Osaka, Japan, Panasonic caters to electronic component mounting and welding machines for various manufacturers including those in the automotive industry and has established the reputation of its integrated production system by utilizing its group capability.
Currently, their thermal processing business has mainly a 6-Axis articulated arc welding robot, TAWERS, and a remote laser welding/laser cutting robot system, LAPRISS. One of the company’s most important tasks is to measure the accuracy of the robot arm’s trajectory.

“We found it attractive that we could effortlessly automate the tasks thanks to the flexible BuildIT software,” explained Ryosuke Yamamoto, a Panasonic engineer. “The best benefit was time reduction. Previously we spent almost all our time at the [customer] site. We started the software to operate the robot and when the robot stopped, we stopped the software. But, with the FARO solution, we don’t have to do anything except push the start button when we start work until the end of the day. When we prepare the night before, the work is done by the next morning, hence our working time is significantly reduced. Eliminating the time spent having to stand by the system for the entire day is a big advantage that means time saved due to this automation. In fact, the FARO system is now used 24 hours a day and it is not uncommon to operate them for 10 days in a row.”
Additionally, the large operating temperature range of the FARO tracker means Panasonic can now measure in factory operation conditions. This allows Panasonic to measure and adjust the robot performance with higher precision than
ever before. When performance of the robots improves, it directly leads to competitive gains.
Superhero Final Truths: The Franchise (Always) Continues
Speaking of 24-hours of non-stop operation, of all the commonalities between Asian and Western superhero pop-culture, perhaps the greatest similarity is that the franchise must always go on. There must always be new iterations, new storylines, new mediums of consumer outreach, and new ways to re-invent and improve upon the original concept. Ultraman came out 55 years ago. And still, a quick search of the term “Ultraman 2021” in Google News returns some 82,000 hits.
The same story holds true for FARO. Newer models, enhanced ease of use, and newfound synergies between hardware and software products will continue to be developed. But the basic formula of success remains unchanged.
There is no better dynamic duo on the market today. That is unless Ultraman and Superman decide to team up. But that’s a topic for another time.
The newest FARO 6Probe represents a quantum leap in probing-tracker technology, makingit faster and easier to inspect parts than ever before. Watch the Video

By Leo Martinez, Product Marketing Manager, FARO® Technologies, Inc.
www.faro.com

